When garages are originally planned and built, their hard concrete floors are supposed to weather the wear and tear of DIY, leaking cars and storage units. With some careful preparation and the right solutions, however, it is relatively simple to transform these into a well-insulated floor space for a living area.
How to prepare your garage floor for insulation
Before fitting any insulation on your garage floor, it is important to give it a careful check for any defects which could lead to issues in the future. This includes cracks or divots in the floor slab or any signs of damp or moisture on the floor slab or surrounding walls. These issues need to be carefully addressed prior to any work. This may include laying a self-levelling screed to ensure a flat and clean surface.
How thick does garage floor insulation need to be?
Garage conversions are typically classed as an extension of an existing building in the Building Regulations/Standards. This means that the converted floor will need to meet a minimal thermal performance level (known as a U-value). The lower the U-value, the better insulated the floor is.
Learn more about U-values
The minimum U-values for garage floors are shown in the table below:
| England | Wales | Scotland |
Floor U-value (W/m2K) | 0.18 | 0.15 | 0.15 |
To work out the thickness of insulation you need to achieve your target U-value, you first need to calculate the Perimeter/Area Ratio (P/A Ratio). You can calculate this by measuring the total exposed perimeter of the garage space and then dividing this by its area. See our article on exposed perimeters for more information.
Once you have this measurement, simply enter it into our U-value calculator along with your construction and desired U-value and it will provide you with a recommended insulation thickness. Visit the U-value calculator.
Keep in mind that this thickness will be specific to the product chosen and will vary depending on the product's thermal conductivity (lambda value). Products with lower thermal conductivities can typically meet the target U-value with a slimmer thickness.
How should I insulate the floor of my garage conversion?
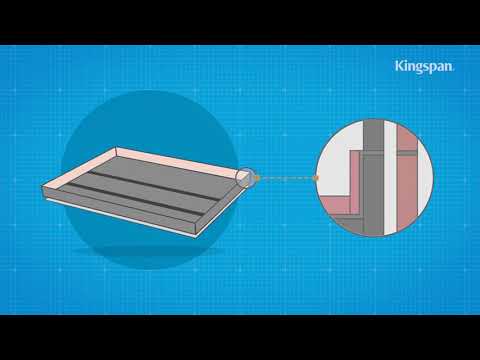
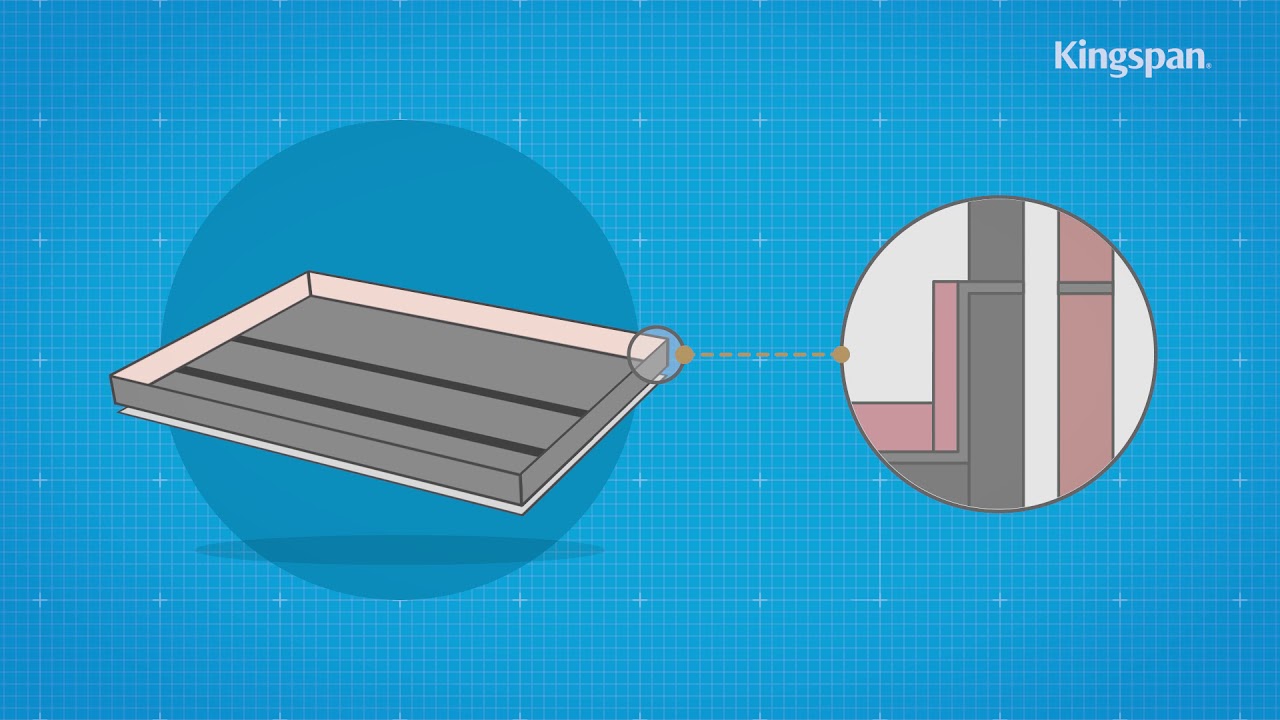
Most garages feature a solid concrete floor construction. As these are typically exposed to wear and tear, start by checking for any imperfections in the floor which may need to be addressed such as divots or imperfections which are deeper than 5 mm.
Once the surface is clean and prepared, start by laying a damp proof membrane (at least 300 microns thick) above the concrete deck. The runs of the membrane should be well overlapped and turned up around the perimeter of the space to the height of the damp proof membrane.
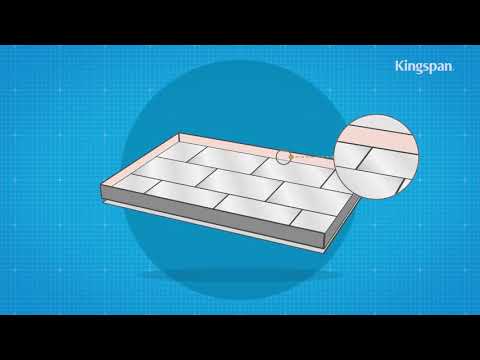
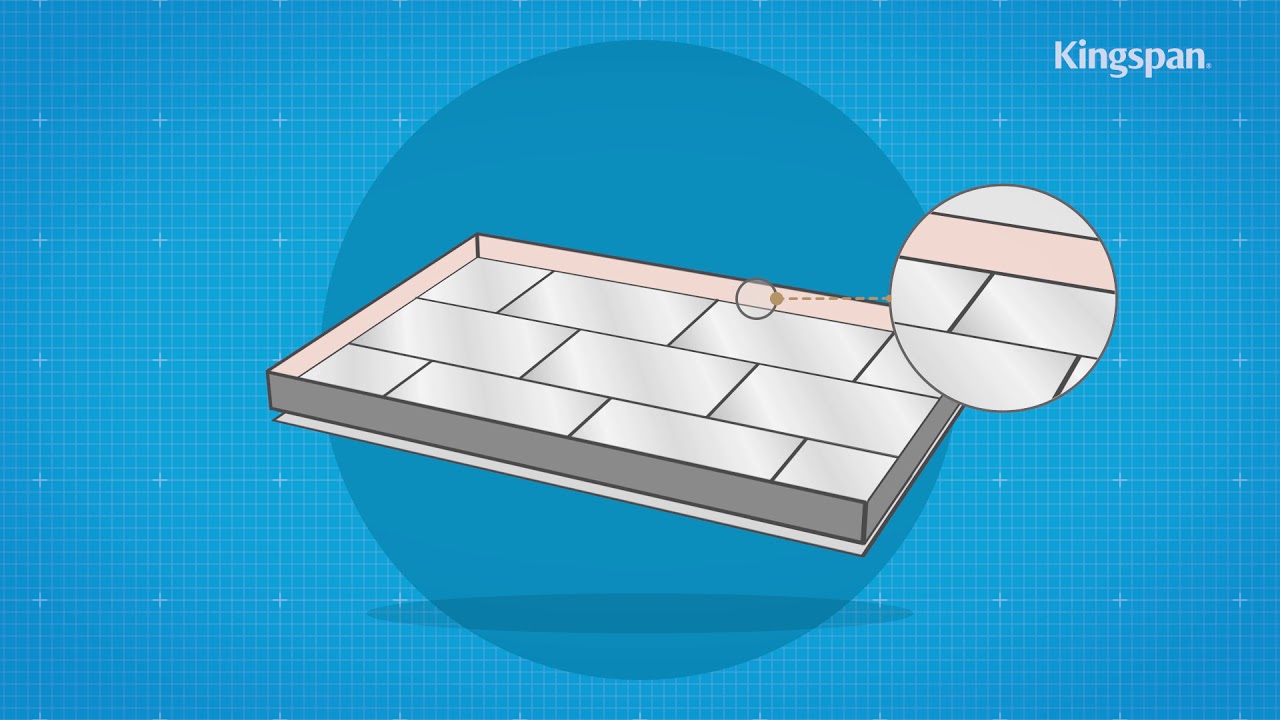
Kooltherm K103 Floorboard can then be overlaid above this. The boards should be fitted in a break-bonded pattern and tightly butted together. A 20 mm thickness of Kooltherm K103 should also be fitted vertically around the edge of the floor to the expected height of the floor screed which will be laid above the insulation. This is to help prevent heat loss from thermal bridging at this junction.
A 125 micron polythene sheet should then be fitted above the insulation to separate it from the floor screed. You can then lay the screed following the manufacturer’s instructions.
How can I maximise headroom when insulating a garage floor?
If the floor level in the garage is only slightly lower than in the main house, or headroom is limited in the space, it may be difficult to insulate the floor with traditional insulation. In these cases, vacuum insulation panels (VIPs) such as the OPTIM-R Flooring System may provide a solution.
Our OPTIM-R VIPs feature a microporous core that is evacuated, encased and sealed in a gas tight envelope. This means they can achieve extremely low thermal conductivities. This makes them ideal for problem applications. As VIPs cannot be cut, we supply our panels with a clear layout for you to follow. Any gaps between the VIPs can then be filled with rigid infill strips of the same thickness.
As with the Kooltherm installation, start by ensuring a clean and level surface. Fit a damp proof membrane as above, then lay a separation layer. The OPTIM-R VIPs should then be fitted from the corner following the installation instructions. Any gaps between the panels should be filled with the infill strips. Once the system is laid, a 125 micron separation layer should be fitted as above, followed by the screed.


